You are using an out of date browser. It may not display this or other websites correctly.
You should upgrade or use an alternative browser.
You should upgrade or use an alternative browser.
rev c install
- Thread starter rot
- Start date
Greetings;
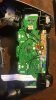
On this particular modchip you won't have to install any wire to the "G" ground pad. It can be left un-connected. (The flex modchip connector that gets sandwiched between the sony circuit board takes care of the G connection for you).
For the S2 wire connection on the JDM-001, the answer you seek is in this post here, we have some photos showing where to make the S2 wire connection: https://forums.vikingdigital.com/threads/pro-remap-mod-chip-ps4.6444/
The remap buttons means the tac switches. Did your kit come with 4 tac buttons that look like this?: http://grobotronics.com/images/thumbnails/300/300/detailed/1/Tact_Switch__48812_zoom.png


Thanks, And alright I got confused by looking at other manuals i thought to tac was a another spot on the controller.Also by the way, welcome!
So I can just uninstall all my ground wires none of the legs need to conected to a ground since thats on the board than? For tac 1 use one wire for the left side pad to one leg on the tac switch. Then the right pad goes to the other leg on the tac switch correct?
Yep. It's helpful if you twist the two wires together as they will be the same length and going to essentially the same place. (Edit: twist them together before installing them) It makes the install cleaner with less wires jumbled around. Also, don't make wires too much longer than needed; with the PS4 there is little extra room and long wires are more likely to become pinched.
WHITE 4ND N3RDY
ModdingBros Representative
As far as wire managment goes I say the fewer the better. What I personally do is drill all my tac holes then hot glue them in place.
Now you have your tac switches mounted in place, take your 30 awg wire and connect it from one leg of your tac switch to the next tac switch, through all tac switches.
All u have to do now is run one wire from any tac switch to a ground point (make sure the wire u run to a ground point is connected to a leg of the tac switch that has been daisy chain together).
Now when you install your remap tac switches all you have to do is run one wire to each tac switch instead of two wires.
The most important part of this is when u wire the tac pads on your flexboard u want to run your wires on the pad to the right, (there is two pads on the flexboard) The left pad on the flexboard the a ground point. If u wire it to the left pad on the flexbord won't recognize the tac It will think it's a ground and not a tac switch!
This will save u so much space and headache of running too many wires.
I'll post up a link of the build I did so u can see exactly what in talking about.
I will add that in the pics I posted, the picture of the tacs are solders to the left side of the remap pads on the flexboard. This is wrong! They need to be on the right pad of the flexboard!
I Hope this helps u out.
https://forums.vikingdigital.com/threads/sick-ps4-rag.6414/
Last edited:
WHITE 4ND N3RDY
ModdingBros Representative
https://m.facebook.com/story.php?story_fbid=1013958358664608&id=100001513613563
Here's a video showing how to connect all the tacs for better wire management. Video quality is poor at best but u should get the big picture out of it all. This will save u a lot of space and headache.
Here's a video showing how to connect all the tacs for better wire management. Video quality is poor at best but u should get the big picture out of it all. This will save u a lot of space and headache.